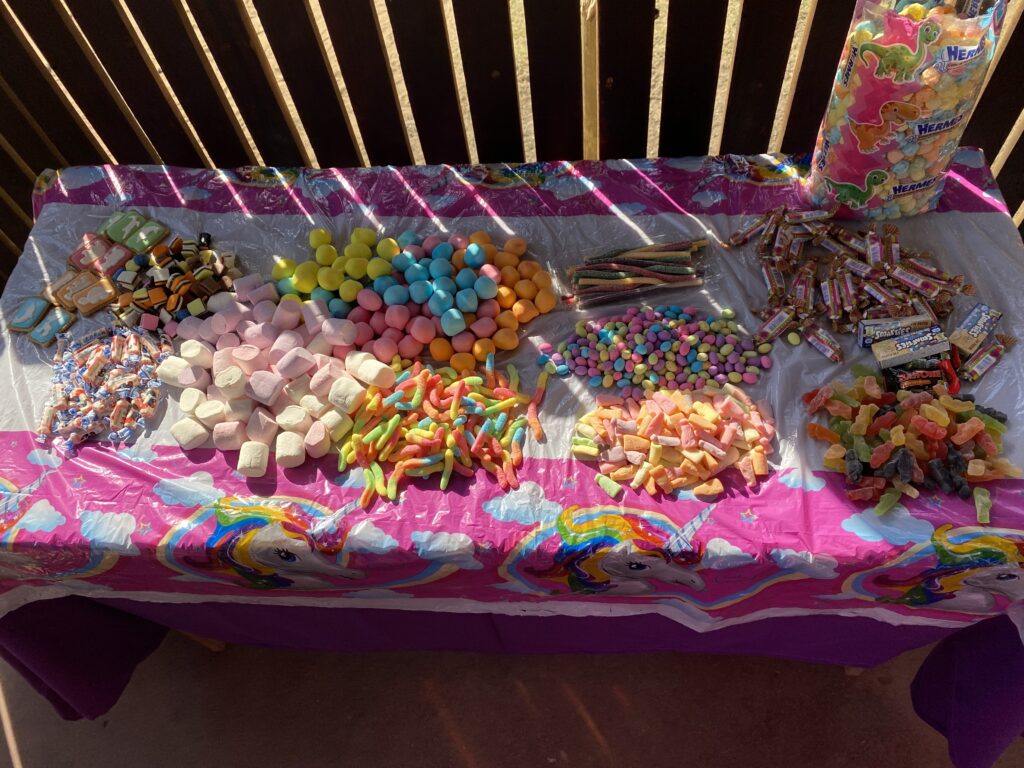
Another unicorn birthday cake idea was needed for Ayla’s 6th birthday and fifth unicorn cake.
Ayla loves unicorns and this weekend she had her 6th birthday party. In 6 birthdays, we’ve had 5 unicorn cakes, so I had run out of unique ideas for her cake. in true tech fashion though I turned to ChatGPT – where I got the idea of doing a pull-apart cupcake cake for her.
Off to Pinterest I went and found this helpful pin: https://pin.it/21qB1Qt
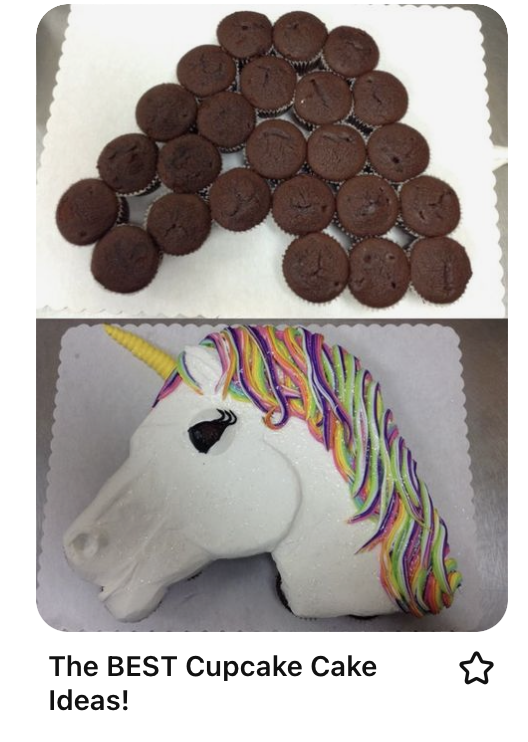
I’d recently also seen the video of Tigga Mac’s pull apart cake hack, which I also used to make the unicorn cake easier.
So using both of these ideas, here’s my Unicorn Pull Apart Cake step by step guide.
Brian baked the cake, and we did a basic white icing, with almond essence, on all the chocolate cup cakes (Ayla’s choice). Once they were cooled and iced, I followed a combination of tutorials to get the finished product.
Step 1: Wax or Baking paper marked for the size of your cake board.
I didn’t have a big enough roll of wax paper, so I had to tape two pieces together. I then placed them on the cake board and marked out the edges of the board, so I had a clear part of the wax paper to work with. I drew on the rougher side of the paper, so that when I iced it would be on the waxy side and pull off more easily. Also tape on the same side that you draw on.
Step 2: Shape of the pull apart cake.
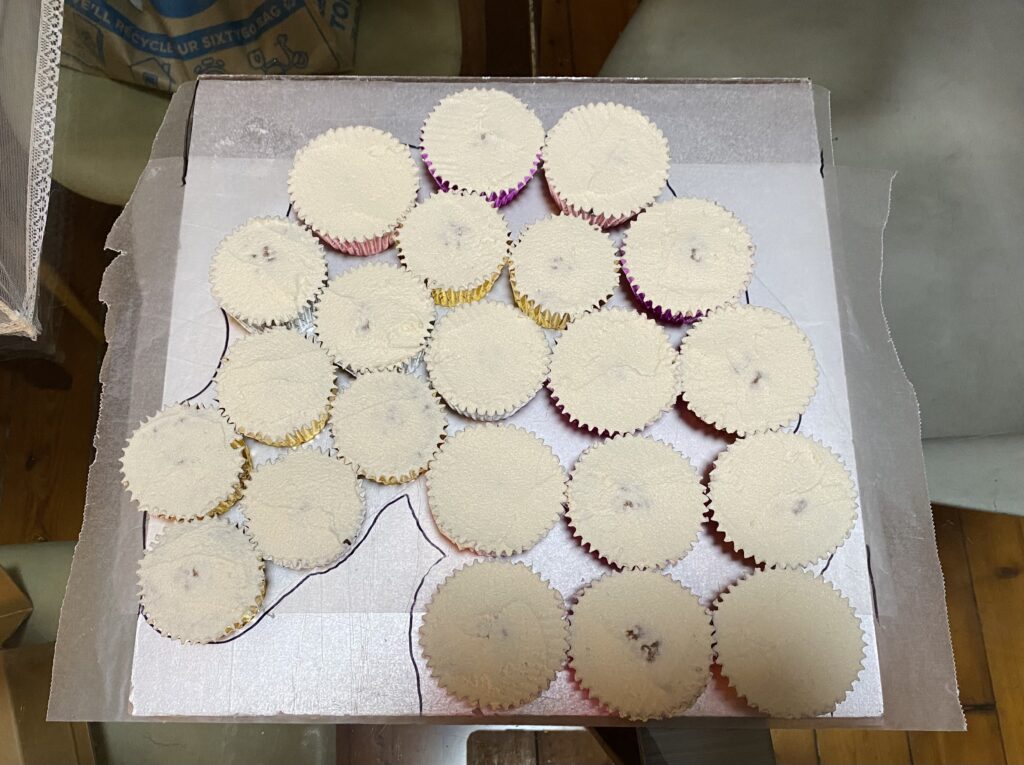
Layout the cup cakes on the board in the shape that you’re aiming for. I used the basic design from the Pin above. If you’re looking for other ideas, I saved a whole bunch of ideas on this Pinterest board.
Once you’re happy with the shape of the cake, use a marker to draw the edges around the cupcakes. I will say that we left a few too many bigger gaps, and it might be better to be more aware of how much space there was between cupcakes, but it worked out ok in the end.
Also take a photo of this step so you can remember where you had your cupcakes placed in the shape.
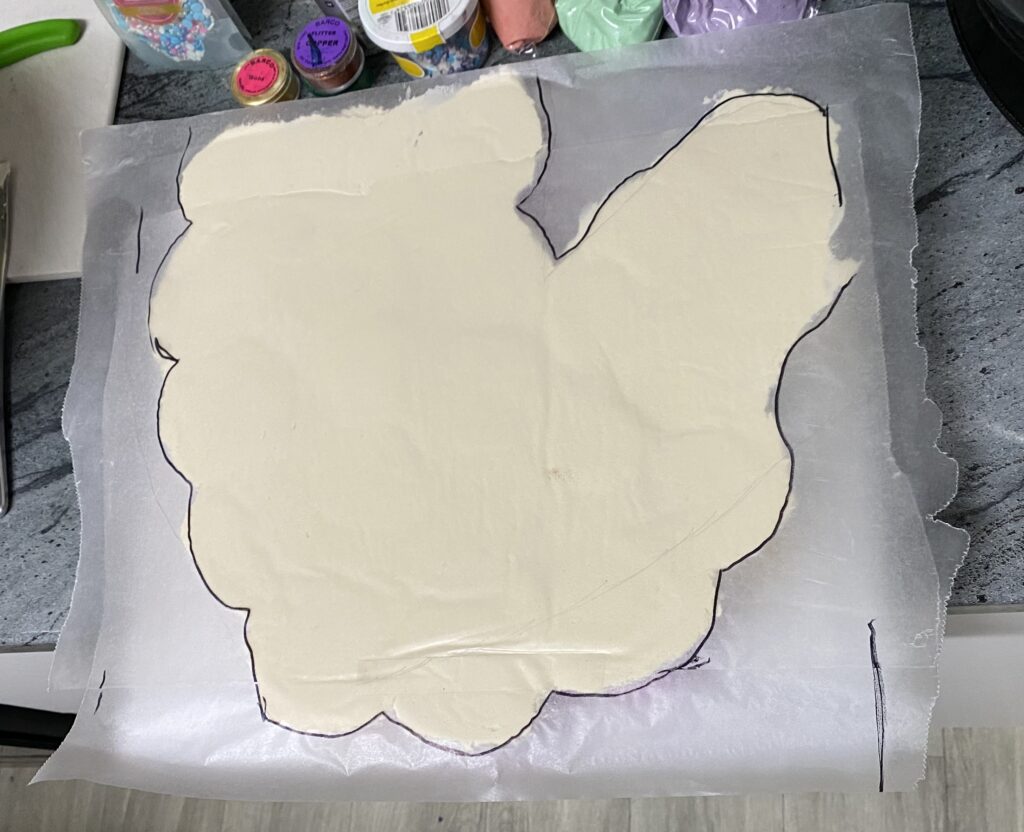
Step 3: Flip the paper and cover with icing.
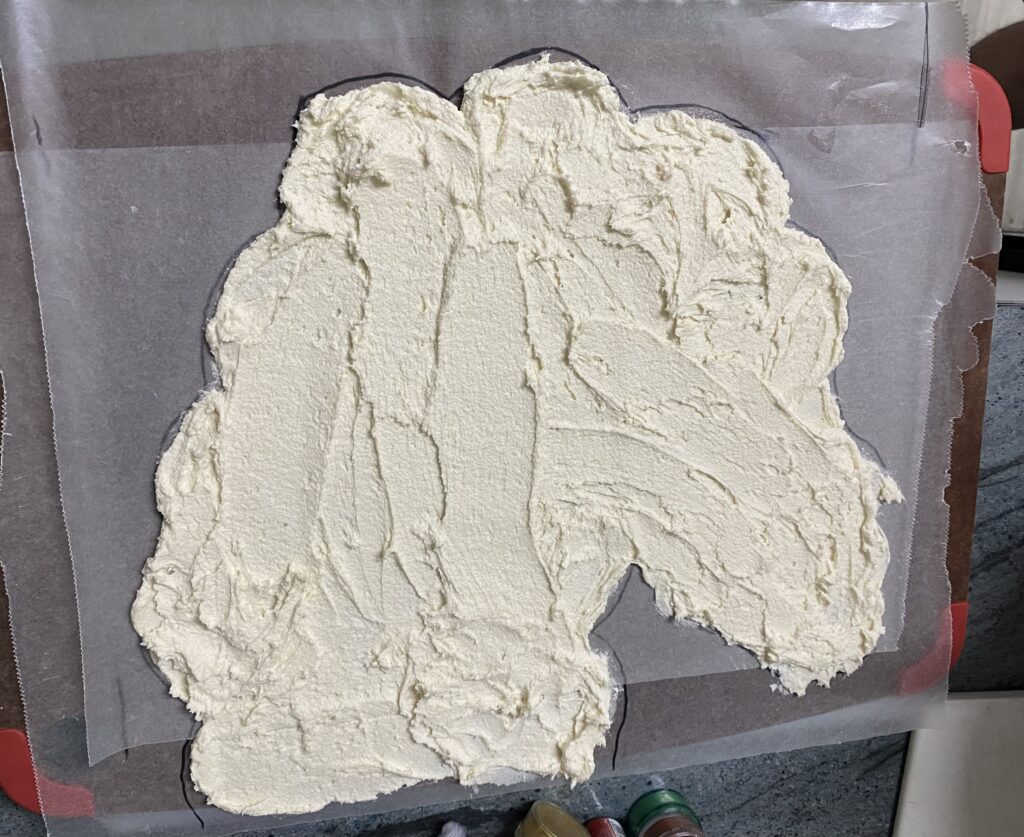
Once you’ve worked out your shape, you then need to cover it with icing. Remember to flip the wax paper so the icing is going on the shiny, waxed side to make it easier to come off. Also so you don’t have marker ink in your icing. Also don’t put the wax paper on the board you want to use for the final presentation – you’ll flip onto that later. I just used a large chopping board.
Tigga suggests piping the icing, but that felt like a lot of work, so I just used a spatula. I realised that because the wax paper will make it smooth, I don’t need to do all that much fussing with the design. I did try carefully to smooth out the edges that were going to stay white. You also want to make sure that you have enough icing on that it will hold once you flip it over.

Here is the finished iced wax paper shape.
Step 4: Put the Cupcakes into the icing.
This is where you’ll refer to you photo from Step 1, but you need to remember to reverse it a little since you’re upside down. Again – pay attention to the spaces you leave between cupcakes. I made a couple of mistakes with this, and we had a few hair raising moments.
We didn’t, but I would suggest adding the horn in here if you’re going to use cake. I have seen cones and other things used, so make your own decision around that. It was a pain trying to get the horn in after we flipped the cake to be honest.

Step 5: Freeze for 10 minutes.
So – I probably should have said this before you start, but make sure you have space in the freezer to pop the whole cake board in for a few minutes. We ended up needing to leave some stuff out while the cake was in the freezer.
Pop the cake and icing upside down in the freezer for about 10 minutes. We probably had ours in for around 15 and it was perfect.
Step 6: Carefully Flip and remove wax paper
Take your cake out of the freezer. Dot a little icing on the bottom of each cupcake to prevent it from sliding around on the cake board. Position your cake board over the cupcakes and carefully, but quickly, flip the whole lot over so that the cupcakes are on the final presentation board, and the wax paper is onto.
The next job is to carefully peel the wax paper off. To be honest, considering how many big spaces I had left, we had minimal issues with holes. I would suggest doing it fairly slowly, and having two people do it did help a little so we could pull from multiple sides.

I also realised I had a few bubbles that I hadn’t smoothed out as well as I could have, but it was already quite late at night and I was tired.
We used a piece of frozen cake we had leftover from Kyle’s party for the horn, and I will suggest adding that to the cake before you put it in the freezer. Trying to manoeuvre it in after flipping the cake was a pain, and I couldn’t get the icing to stick either.
Step 7: Decorate and fill in gaps
Finally to decorate I used zip lock bags with various coloured icing in that I squeezed out, like a piping bag, as the mane. I also used the spatula and a knife to fill in the gaps as needed.
I had 4 colours which I alternated through twice. Ayla’s favourite colour is purple, so I finished with that. I also cut different sized holes in the bags to add a bit of texture. I first went one layer of each colour, then reversed the order adding different squiggles. Finally I iced the closed eye and added some mixed pearl sprinkles.
For the horn I used tiny silver balls patted into the icing, and finished with some gold sparkle dust.


Step 8: Final presentation and candles.
Transporting the cake wasn’t too bad, as the icing under the cupcakes prevented the cake from sliding at all, and we just kept the car really cold.
I put the candles in the head section and added an LED number 6 for a fun element.

Quick Steps:
Here are the steps summed up:
- Bake, cool and rough ice your cupcakes
- Lay them out on wax or baking paper in the shape you want.
- Draw the line around the cupcakes
- Flip the wax paper so you don’t get ink in your icing.
- Ice the shape
- Put the cupcakes into the icing
- Freeze for 10 minutes
- Flip
- Peel wax paper off
- Decorate as desired
- Present and enjoy!
Conclusion
I’ll definitely be doing a pull apart cake again. This method was simple and easy to execute. I also liked how easy it was to serve and how versatile it is for the various shapes and ideas my kids come up with. Being a little more careful with icing the wax paper will make a difference, as will ensuring the gaps between cupcakes are as small as possible helps too.
8/10 – highly recommend this method.
Ayla had a wonderful party at the awesome Flag Animal Farm and I think it was a really fun unicorn theme with quite a few new ideas, and lots of reused decor – so that’s a win.

